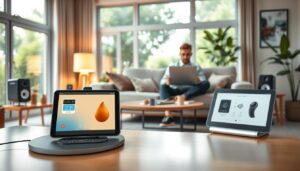
Modern homes now blend everyday objects with cutting-edge tech. One standout innovation combines reflective surfaces with interactive displays. These devices let users check the weather, manage schedules, and control appliances while preparing for the day.
This guide reveals how to build a functional tech-enhanced surface using basic tools and affordable components. What began as sci-fi fantasy now fits seamlessly into apartments and houses across America. Enthusiasts merge woodworking skills with Raspberry Pi setups to craft personalized interfaces.
The process involves two-way glass, open-source software like Magic Mirror, and optional add-ons like touchscreens. Builds range from compact 7-inch designs to full-wall installations. Costs stay manageable whether using spare monitors or premium displays.
Finished products serve dual purposes: standard reflection and real-time data hub. Users access news feeds, calendar alerts, and smart device controls without reaching for phones. Modular designs allow upgrades as new tech emerges.
This project proves advanced home automation isn’t reserved for tech experts. With clear instructions, anyone can merge practical craftsmanship with digital convenience. The result? A sleek centerpiece that organizes daily routines while maintaining timeless functionality.
Understanding the Smart Mirror Concept
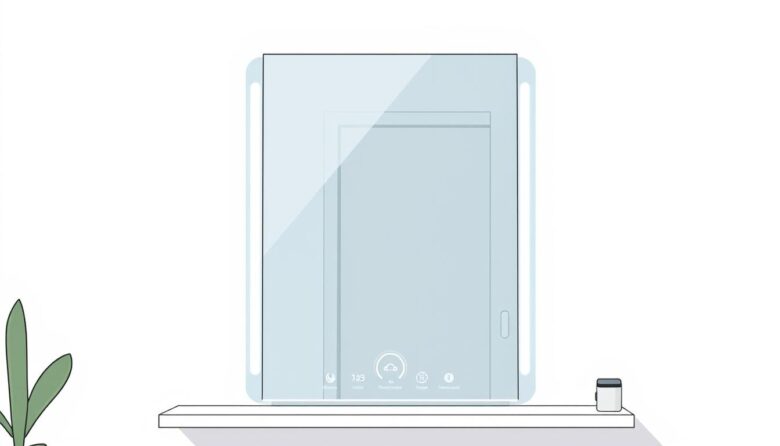
Everyday surfaces now double as interactive information centers. This transformation relies on two-way glass technology, where light passes through from behind while maintaining reflection on the front side. A hidden monitor projects data like time, weather conditions, and calendar events through this specialized surface.
From Luxury Gadgets to Practical Tools
Early versions appeared in high-end hotels and retail stores, costing thousands. Today, open-source software like Magic Mirror and affordable Raspberry Pi kits changed the game. Over 400 modules let users add features like voice commands or traffic alerts.
These devices streamline morning routines by showing commute times alongside personal schedules. Home automation integration takes it further – adjust thermostats or lock doors while brushing your teeth. The display remains invisible until activated, preserving the surface’s primary function.
Customization options cater to diverse needs. Fitness enthusiasts track workouts, while others monitor stock prices or social feeds. Modular designs ensure systems evolve with technological advancements without requiring full rebuilds.
Gathering Essential Tools and Materials
Assembling a functional tech-enhanced surface begins with selecting components that balance performance and accessibility. An 18″ x 24″ picture frame forms the structural base, chosen for its compatibility with standard monitor sizes. This dimension allows ample space for electronics while maintaining a practical footprint.
Parts, Electronics, and Tools Overview
The Acer 1080p monitor delivers crisp visuals through two-way surfaces. Pair it with a Raspberry Pi 4 (2GB+ RAM) for reliable processing. A 90-degree HDMI adapter ensures clutter-free cable routing behind the frame.
Two-way glass remains the gold standard for clarity, though acrylic alternatives reduce weight and breakage risks. Secure components using 1.25″ wood screws and reinforce joints with a pocket hole jig. Precision tools like tape measures and drills prevent alignment issues during assembly.
Optional LED aluminum channels add ambient lighting when connected to 24V power supplies. These enhancements require COB strips and dimmer controls for adjustable brightness. Always test electronics before final installation to avoid disassembly hassles.
Quality materials ensure your surface withstands daily use while maintaining its reflective properties. From plywood backings to black acrylic paint for light sealing, each element contributes to professional-grade results. Proper preparation transforms ordinary objects into unified tech solutions.
Planning Your Build and Design Strategy
Meticulous preparation separates amateur attempts from polished results in tech-enhanced home projects. Start by measuring your display diagonally, then add 5cm (2 inches) to each side for proper frame overlap. Free online calculators simplify wood cutting lists by converting screen dimensions into precise lumber requirements.
Ventilation slots prove crucial for preventing heat buildup behind the reflective surface. Position airflow channels near the Raspberry Pi and power supply while maintaining structural integrity. Cable management requires pre-drilled pathways that keep wires organized yet accessible for future upgrades.
Consider potential expansions during the initial design phase. Leave mounting points for LED strips or motion sensors, and ensure service panels align with electronic components. The process demands balancing aesthetics with functionality – recessed joints hide hardware while allowing easy disassembly.
Weight distribution affects both safety and daily use. Calculate the combined mass of glass, monitor, and framing materials to select appropriate wall anchors. Professional builders recommend testing the setup with temporary supports before final installation.
Successful projects account for environmental factors like humidity and sunlight exposure. Position screens away from direct light sources, and use moisture-resistant sealants in bathrooms. These steps ensure your tech-enhanced surface remains functional for years while blending into any room’s decor.
Designing and Constructing the Frame
Structural integrity begins with precise measurements and material choices. The frame serves as both support system and aesthetic element, requiring careful balance between durability and visual appeal. Start by cutting 3/4″ plywood into strips based on your display size – two longer pieces at 25.75″ and two shorter ones at 18.25″ for standard 18″x24″ setups.
Material Preparation and Cutting
Use a circular saw or table saw to ensure straight edges on all wood pieces. Add two 1.5″ wide strips to reinforce the back panel. Sand surfaces thoroughly before assembly to prevent splinters and ensure proper paint adhesion. Mark pocket hole locations 3″ from each end using a carpenter’s pencil.
Joining Techniques for Stability
Drill pocket holes with a 3/4″ setting, maintaining consistent depth to avoid breakthrough. Apply glue to joint surfaces before securing with 1.25″ wood screws. Check diagonal measurements twice – discrepancies over 1/8″ require adjustments. Let the frame dry completely before moving to the next step.
Finish with black acrylic paint applied in thin, even coats. This enhances light absorption while matching commercial frame aesthetics. Allow 24 hours curing time before mounting electronics to ensure scratch resistance.
Preparing the Display and Monitor for Integration
Transforming standard displays into interactive surfaces demands precision and foresight. Proper setup ensures seamless integration between electronic components and physical materials. This phase bridges technical specifications with hands-on craftsmanship.
Disassembling for Custom Fit
Begin by adjusting the monitor brightness to maximum. This critical step prevents visibility issues later. Remove the stand using a Phillips screwdriver, then locate small fasteners near HDMI and power ports.
Gently pry open the back panel using plastic tools. Start at the perimeter tabs to avoid cracking the housing. Document each step with photos for reassembly reference. Preserve control buttons and ribbon cables during disassembly.
Create a cardboard template matching the display dimensions. This ensures accurate placement within the frame. Test fit the screen before securing it with brackets. Proper alignment prevents light leaks and maintains surface clarity.
Route cables through pre-drilled channels to avoid pinching. Use a 90-degree HDMI adapter for tight spaces. Verify all connections before final assembly to ensure optimal performance.
Create Smart Mirror: Step-by-Step Instructions
Building a tech-enhanced surface combines craftsmanship with digital integration. Precision becomes paramount when merging structural elements with delicate components. This phase turns prepared materials into a unified system through careful execution.
Building the Back Frame and Alignment
Cut two plywood strips 1/4″ narrower than your frame’s interior width. Use a miter saw for clean edges. Drill single pocket holes at both ends of each strip – these hidden joints maintain a clean aesthetic.
Position the first support 1″ above the frame’s base for weight distribution. Secure it using 1.25″ wood screws through pre-drilled holes. The second strip mounts three-quarters up the structure, creating pressure against the two-way surface.
Precision Cutting and Component Integration
Test-fit all parts before final assembly. Mark cable channels on support strips using the monitor’s port layout as reference. A rotary tool carves clean pathways while preserving structural strength.
Align the reflective surface using painter’s tape along the frame edges. Check spacing with feeler gauges – maintain 1/16″ clearance on all sides. This step prevents stress cracks while ensuring seamless information display.
Secure components working from the center outward. Alternate tightening screws in a star pattern to avoid warping. Final checks confirm proper alignment and cable management before sealing the back panel.
Integrating the Two-Way Mirror Component
The two-way mirror forms the core of your interactive surface. This specialized component works by letting light pass through its rear while reflecting images on the front. Proper orientation matters – install the bright reflective side facing outward for optimal visibility.
Begin by removing the frame’s original backing. Fold metal tabs inward to secure the surface without damaging edges. Carefully place the mirror, ensuring full alignment with the display. Glass versions offer sharper image quality but require cautious handling.
Acrylic alternatives reduce breakage risks while maintaining decent light transmission. Both materials demand clean, fingerprint-free surfaces during installation. Test the setup before finalizing – displayed information should appear crisp through the two-way mirror without glare interference.
Seal edges with weatherstripping to prevent dust accumulation. This protects sensitive electronics while maintaining the surface’s dual functionality. Your mirror now bridges physical reflection with digital data seamlessly.