Your Android phone holds a powerful secret. Beneath its standard interface lies a special menu packed with extra features. This area is called the developer options.
Manufacturers hide these settings by default. This prevents accidental changes that could affect your device. Unlocking them gives you a new level of control.
You do not need to be a programmer to benefit. These tools offer advantages for any user. They can speed up your phone and allow for deep customization.
Our guide shows you how to access these features safely. You will learn step-by-step activation. We also explain practical uses for various settings.
Exploring these options is secure with proper guidance. You can optimize performance without risk. This knowledge empowers you to get more from your technology.
Understanding the Power of Android Developer Tools
Beneath the surface of your Android interface lies a comprehensive toolkit designed for fine-tuning system behavior. This collection of settings, known as developer mode, provides unprecedented control over your device’s operations.
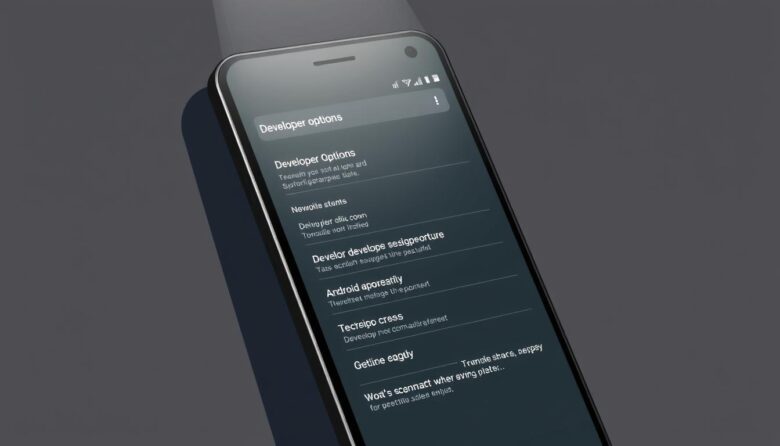
What Developer Mode Offers
The Android developer options contain various tools for system optimization. These features help monitor app performance and debug software issues. Professional developers use them for testing applications.
Regular users can also benefit from many settings. Animation controls can speed up your phone’s responsiveness. Background process management improves battery life.
The Benefits for Regular and Advanced Users
This mode offers advantages for different experience levels. Debugging tools assist programmers with app development. Customization settings help all users personalize their devices.
Performance enhancements are available through simple adjustments. Display density changes can show more content on screen. USB debugging enables advanced connectivity options.
Access to these tools empowers you to optimize your Android experience. They provide deeper insight into how your device functions.
How to Enable Developer Options on Your Device
The pathway to enhanced Android functionality starts with enabling special system features. This process is straightforward and requires no technical expertise. You simply need to follow specific steps carefully.
Locating the Build Number
Begin by opening your phone’s settings menu. Scroll down to find the “About phone” section. The exact location may vary depending on your device model.
Some manufacturers place this information under “Status” or similar headings. Look for the build number entry within this area. This identifier contains your Android version details.
Activating the Hidden Developer Mode
Tap the build number exactly seven times to initiate activation. Your device will prompt for security verification during this process. Enter your pattern or password when requested.
A confirmation message will appear stating “You are now a developer.” Return to the main settings menu and look for “System” or “Additional settings.” The new developer options entry will be visible there.
When you first access this menu, enable the main toggle switch. This grants full access to all available configuration settings. Use the search function if you cannot locate the option immediately.
Essential “developer options, advanced users, tweaks” for Optimal Control
Once you have enabled the hidden menu, configuring the most impactful settings is your next step. This section guides you through the foundational adjustments that provide immediate benefits.
These configurations unlock deeper interaction with your hardware and software. They are the gateway to truly customizing your Android experience.
Setting Up USB Debugging
USB debugging is a critical feature for anyone wanting to connect their phone to a computer for advanced tasks. It allows for direct communication between your device and a PC using the Android Debug Bridge (ADB).
This tool is essential for troubleshooting, installing apps manually, and accessing system logs. Enabling it is simple. Just find the “USB debugging” option in the menu and toggle it on.
Newer Android versions also support wireless debugging. This lets you run ADB commands over Wi-Fi without a physical cable. Always remember to disable this setting when not in use for security.
Customizing Basic Settings
Another vital setting is “Default USB configuration.” This controls what happens automatically when you plug your phone into a computer.
You can choose from File Transfer for managing files, USB tethering to share your internet, or “Charging only” for power. Selecting the right default saves time with every connection.
For those interested in deeper modifications, the “OEM unlocking” option is available. It permits the installation of custom software. This is an optional step for most people but is useful for specific projects.
Leveraging Advanced Settings for Enhanced Performance
The true power of Android customization reveals itself when you manage what happens in the background. These settings provide deep control over your device’s operation and resource allocation.
Managing Background Processes
The Running Services dashboard offers real-time visibility into active processes. You can see which applications consume memory and system resources. This helps identify what might be slowing down your phone.
From this screen, you can stop any problematic processes manually. This immediate action can resolve performance issues quickly. The tool shows both active and cached applications.
The Background Process Limit setting allows you to restrict how many apps run simultaneously. Choosing the right number balances performance with functionality. Too few may prevent legitimate apps from working properly.
For multitasking enthusiasts, the “Force activities to be resizable” option is valuable. It enables multi-window mode for apps that don’t normally support it. This feature works especially well on foldable devices and tablets.
Experiment with different configurations to find your optimal setup. Monitor how changes affect your device’s responsiveness. Finding the right balance improves both performance and battery life.
Tuning Animations and Visual Transitions
The fluid movements between apps and screens can be fine-tuned for optimal performance. These visual effects contribute significantly to how responsive your device feels during daily use.
Adjusting these transitions offers immediate improvements to navigation speed. Many people find this one of the most satisfying customizations available.
Adjusting Window and Transition Animation Scales
Window animation scale controls how applications open and close on your screen. Transition animation scale affects movements between different activities.
Setting both values to 0.5x creates faster visual feedback. This makes your phone feel more immediate and responsive.
Lower values reduce the time animations take to complete. You can experiment with different speeds to find your preference.
Modifying Animator Duration Scale
This setting influences other visual effects throughout the interface. It controls how long certain elements take to animate.
Reducing this scale to 0.5x speeds up all remaining visual transitions. Some people prefer turning animations off completely for maximum speed.
Be aware that extremely fast animations might reveal loading delays. Finding the right balance ensures smooth operation.
These adjustments provide immediate visual feedback about your changes. You can quickly test different configurations to optimize your experience.
Enhancing Connectivity and Data Management
Optimizing network behavior through specialized settings provides a balance between speed and energy conservation. These configurations help manage how your device handles various connection types.
Configuring Wired and Wireless USB Debugging
Wireless debugging allows connection to a computer without physical cables. This feature uses Wi-Fi for communication between your phone and development tools.
The setting keeps both Wi-Fi and mobile data active simultaneously. This ensures seamless switching between networks but increases battery consumption.
Disable this feature if you primarily use stable Wi-Fi connections. It helps conserve power when cellular data isn’t needed. However, maintain the setting if you use Wi-Fi Calling to prevent dropped calls.
Wi-Fi scan throttling reduces how often apps search for networks in the background. It changes scanning frequency from every 15 seconds to every 30 minutes. This adjustment preserves battery while maintaining reasonable connectivity.
Choose settings based on your typical usage patterns. Balance performance needs with energy efficiency for optimal results.
Practical Tweaks for Daily Use
Several adjustments in the hidden menu directly improve your daily interaction with the device. These configurations focus on visual clarity, battery longevity, and input feedback.
They provide tangible benefits without requiring complex technical knowledge. You can apply them quickly for an instant upgrade.
Optimizing Battery and Display Settings
The Stay Awake feature is perfect for charging sessions. It prevents your screen from turning off while connected to power.
This is ideal for monitoring messages or watching videos. For display smoothness, explore the refresh rate toggles.
You can show the current rate on-screen or force the highest setting. The latter offers maximum fluidity but may reduce your battery life.
Adjusting the Smallest width setting changes how much fits on your screen. A higher number makes content smaller, showing more information.
A lower number increases size for easier reading. The Override force-dark mode applies a dark theme to unsupported apps.
Use this with caution, as it can sometimes cause display issues.
Enabling Touch Visualization Features
Touch feedback tools are excellent for troubleshooting or creating guides. The Show taps option places a dot where you touch the screen.
For more detailed input data, enable Pointer location. This shows lines tracing your touch path with coordinates.
It helps identify unresponsive areas on your display. Another useful setting reveals Bluetooth devices without names by their MAC address.
This assists when pairing with unfamiliar hardware. These practical changes give you greater control over your phone’s behavior.
Tips for Secure and Efficient Developer Tool Use
While developer tools offer enhanced control, they also introduce important security considerations. These powerful features bypass standard safety measures built into your Android interface.
Understanding potential risks helps you make informed decisions. This knowledge protects your personal data and device integrity.
Best Practices for Safe Customizations
Certain settings can weaken your phone’s security when enabled. The OEM unlocking and mock location features create vulnerabilities.
Malicious actors could exploit these openings for unauthorized access. Only activate these tools when you have a specific, well-understood need.
USB debugging gives computers full control over your device data. Never connect to public or untrusted machines with this setting active.
Disable USB debugging immediately after completing your tasks. This prevents accidental connections that could compromise your information.
The screen share protection toggle removes safeguards for sensitive apps. Banking and payment applications become vulnerable to screen recording malware.
Keep this protection enabled unless absolutely necessary. Always revert changes if you notice unexpected behavior or performance issues.
Make one adjustment at a time and test thoroughly. This approach helps identify problematic settings quickly. Document your changes for easy reversal if needed.
Final Insights on Mastering Android Developer Tools
Taking command of your device’s settings empowers you to create a personalized mobile experience. The developer mode provides tools that transform how your technology responds to your needs.
Throughout this guide, you’ve discovered ways to optimize performance, manage connectivity, customize displays, and maintain security. These adjustments work together to enhance your daily interaction with your Android phone.
Remember to experiment carefully with one change at a time. The most beneficial features are often the simplest to implement. Your settings remain accessible for future adjustments as your needs evolve.
This knowledge gives you greater control over your Android device. Continue exploring responsibly to build the perfect mobile experience for your lifestyle.